Setup a DNS challenge with Cloudflare
Overview
In this guide, we will show you how to set up your Runtipi instance with a dns challenge and cloudflare. By default Runtipi uses an http challenge to obtain ssl certificates requiring you to expose the dashboard to the internet which is a very bad security practice. With a DNS challenge you can get trusted ssl certificates without needing to expose anything to the internet.
Requirements
- A Runtipi instance
- A domain name connected to cloudflare
Setting up the DNS challenge
So let’s get started setting up the DNS challenge.
Set up the DNS records
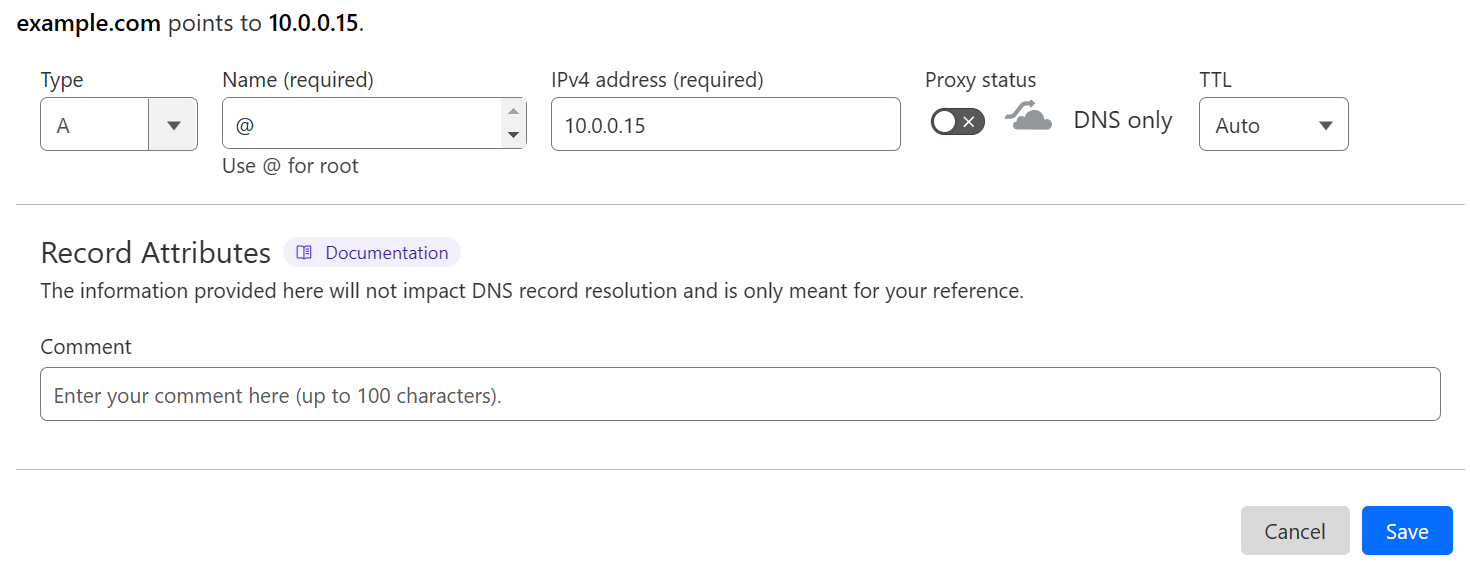
To begin with we need to set up two DNS records in our cloudflare dashboard, one should look like this:
And the other one should look like this:
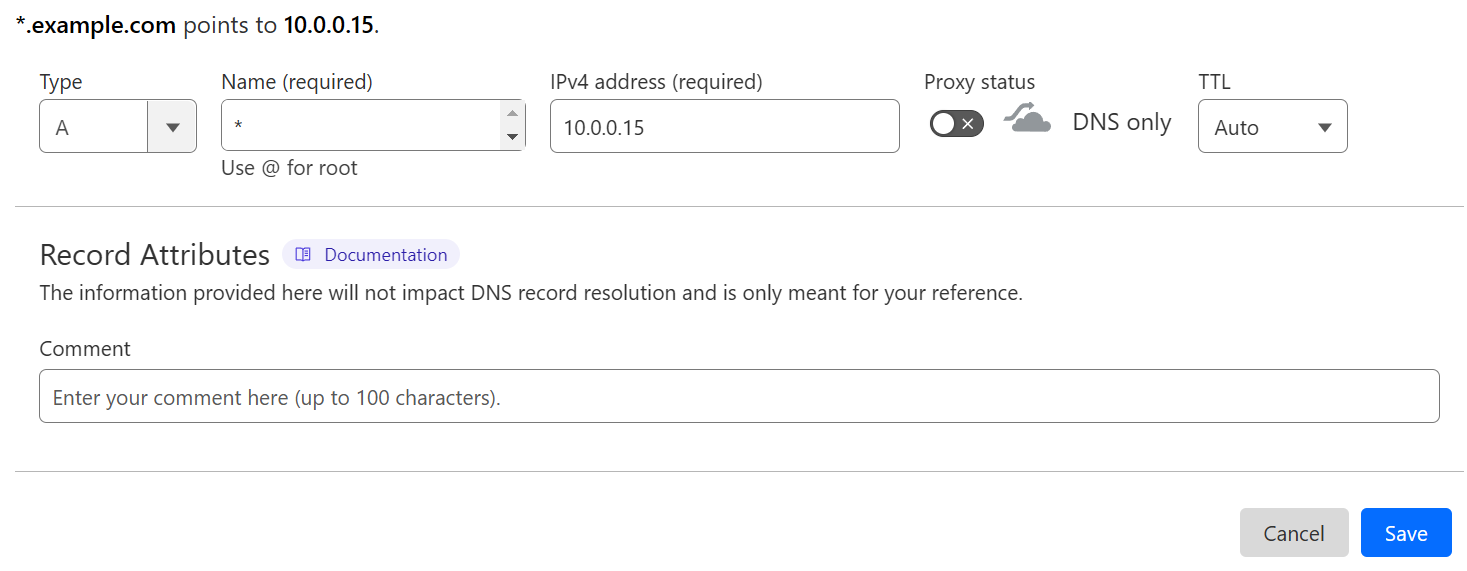
Make sure to replace 10.0.0.15 with the IP address of your Runtipi server.
Obtain your API key
Now we need to get the api key that traefik is going to use to get the certificates. In order to do that go to this page
of the cloudflare dashboard and click Create token. Then select the Edit zone DNS template. The only thing you need to do is select your domain in
the Zone Resources section. Finally click Continue to summary and then Create token, make sure to save that token since you can only view it once.
Create the custom compose file
We need to give the token to traefik in order to do that we need to create a custom compose with the following contents:
services:
  runtipi-reverse-proxy:
    environment:
      - CF_DNS_API_TOKEN=yourtoken
Make sure to replace the yourtoken part with the actual token you got in the previous step.
If you don’t know how to create a custom compose file you can check the guide here.
Edit the traefik config
Now it is time to edit the traefik config. You need to replace this part:
certificatesResolvers:
  myresolver:
    acme:
      email: acme@thisprops.com
      storage: /shared/acme.json
      httpChallenge:
        entryPoint: web
To this:
certificatesResolvers:
  myresolver:
    acme:
      email: email@example.com
      storage: /shared/acme.json
      dnsChallenge:
        provider: cloudflare
        delayBeforeCheck: 0
Make sure to replace the email@example.com with your actual email address so Let’s Encrypt can notify you if something is wrong.
Make sure that you have enabled the option to persist the traefik config. If you are not sure how to do it check the guide here.
Restart Runtipi and test
Finally we need to restart Runtipi with this command:
sudo ./runtipi-cli restartAfter that you can go to your Runtipi dashboard and try to expose an app, after you expose it traefik should automatically obtain an ssl certificate from Let’s Encrypt, be patient though, it may take up to 2 minutes to complete.