Create your own app store
As of Runtipi version v4.0.0, you can create and use your own custom app stores alongside the official one. This feature allows you to create, maintain, and share your own collection of apps.
This feature requires Runtipi version v4.0.0 or above.
This feature is intended for users who are comfortable with GitHub and are willing to maintain and share their own app store. If you just want to install apps for yourself, we recommend using the “create custom app” feature instead.
Why create your own app store?
There are several reasons why you might want to create your own app store:
- Host specialized apps not available in the official repository
- Develop and test new apps
- Create an app store specific to your organization or use case
- Modify existing apps to better suit your needs
- Share your collection of apps with others
Setting up your own app store repository
Use the repository template
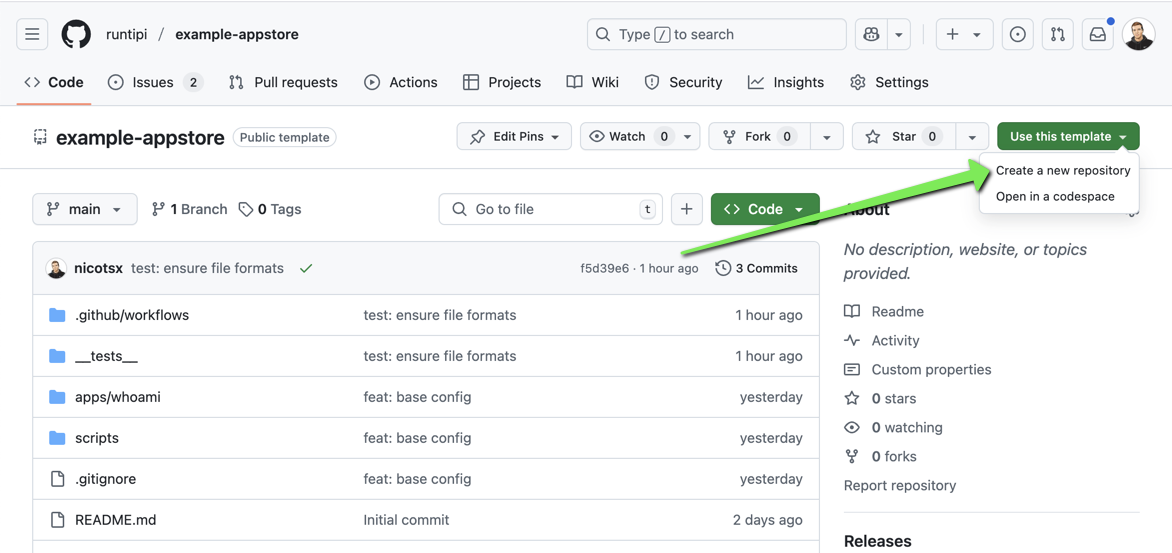
First, head over to the Runtipi app store template repository and click the “Use this template” button to create a new repository based on the template. This will give you a starting point with the necessary structure and files.
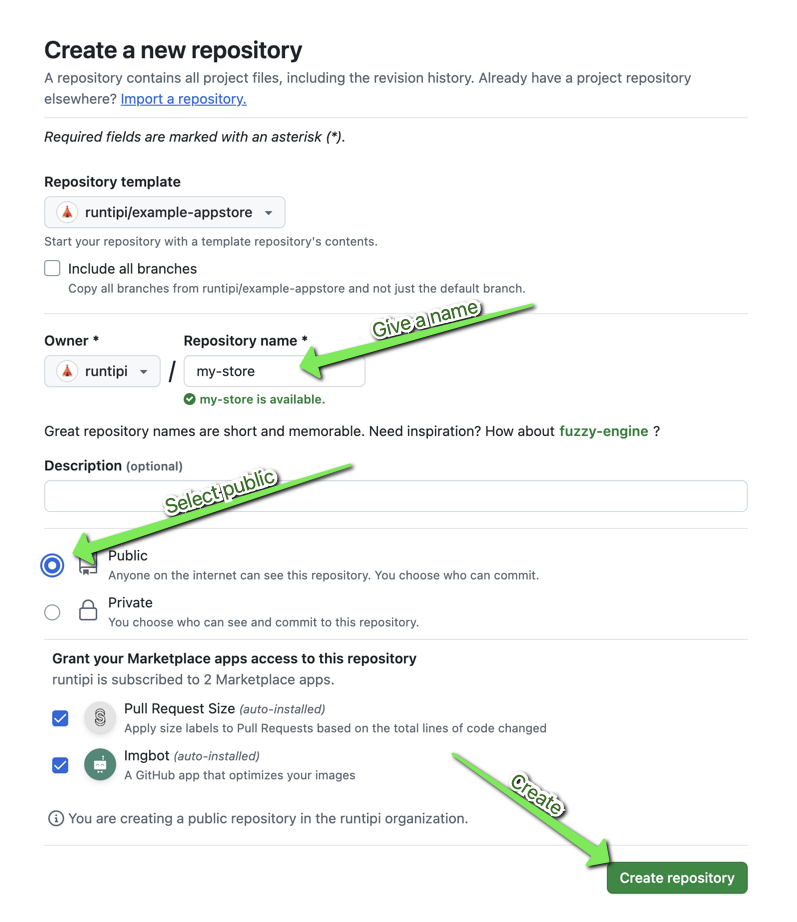
Give your new repository a meaningful name and make sure to set it as a public repository.
Add your new store to Runtipi
Grab the URL of your new repository. It should look something like this:
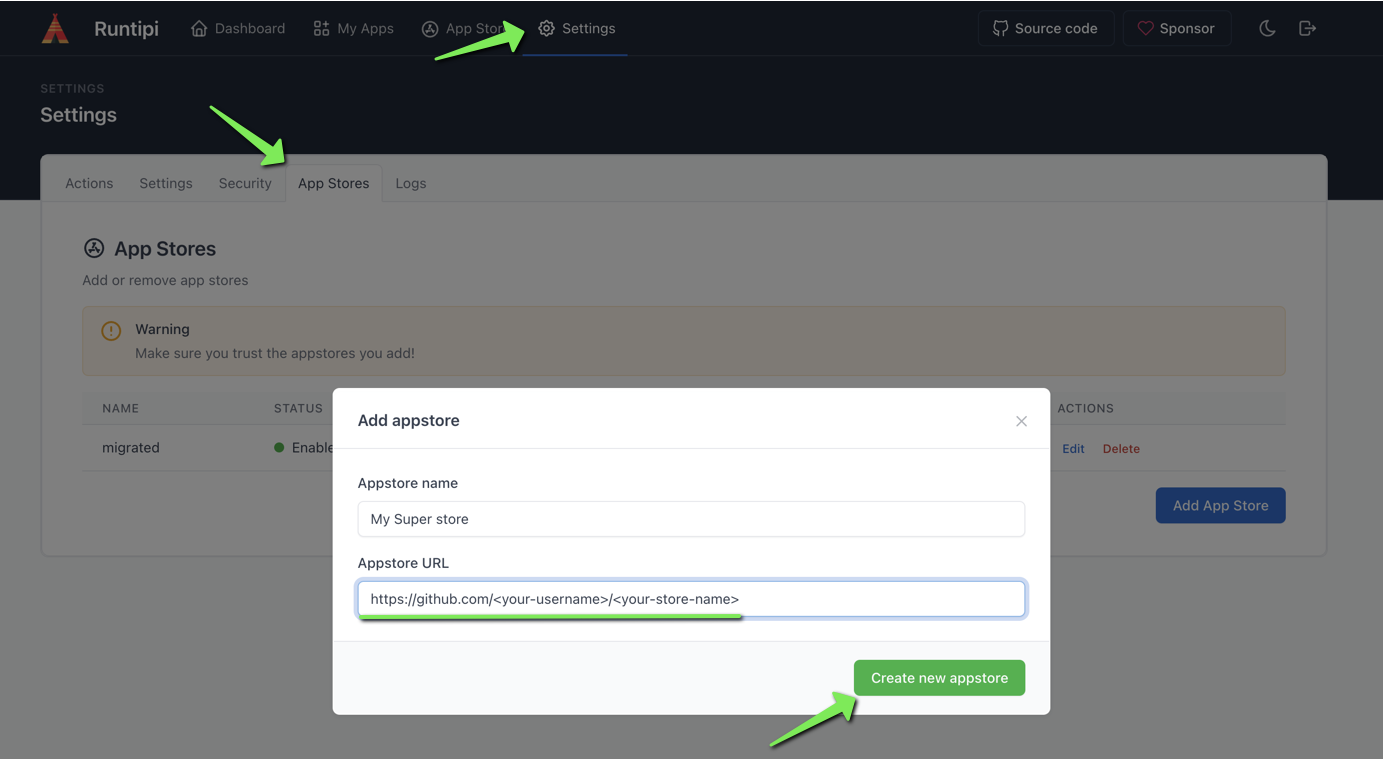
https://github.com/<your-username>/<your-store-name>Head over to your Runtipi instance and navigate to the settings page. Click on “App Stores” and then “Add App Store”.
Paste the URL of your new repository and give it a name. This name will be used to identify the app store in the Runtipi dashboard.
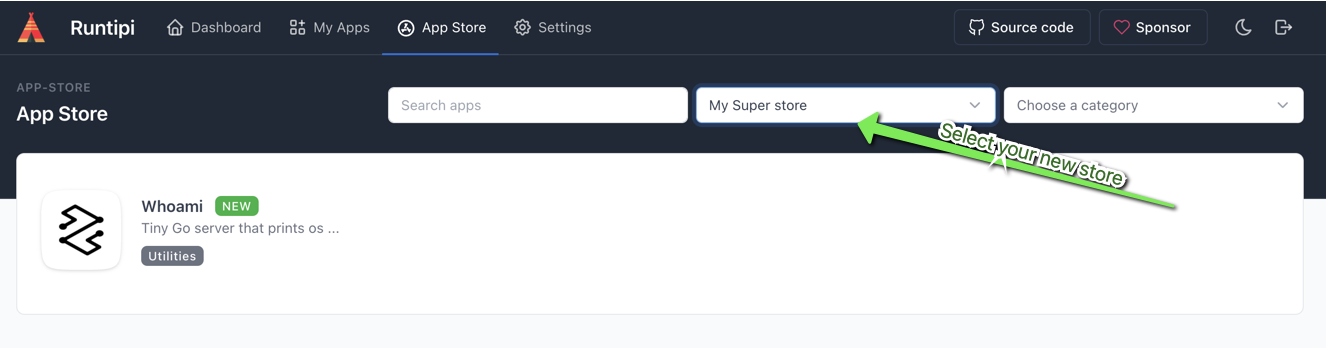
You should see your new app store listed in the app stores section with the default Whoami app.
Create your first app
First, clone your new repository to your local machine:
git clone <your-repo-url>Open the cloned repository in your favorite code editor. Inside the apps directory, you’ll find a sample app called whoami. You can use this as a template for your own apps.
Each app should be in its own folder inside the apps directory. The folder name should match the app’s ID in the config.json file. For each app, you’ll need:
- A
config.jsonfile with app metadata (name, description, version, etc.) - A
docker-compose.ymlfile defining the app’s services withx-runtipimetadata - A
metadatafolder containing at least alogo.jpgimage and adescription.mdfile
We will add Nginx as an example app.
First create a new folder in the apps directory called nginx. Inside this folder, create docker-compose.yml and config.json.
Here’s the docker-compose.yml
services:
  nginx:
    image: nginx:1.25.3
    x-runtipi:
      is_main: true
      internal_port: 80

x-runtipi:
  schema_version: 2
New apps should use docker-compose.yml. Legacy docker-compose.json files
are still supported, but they are converted internally.
And it’s corresponding config.json:
{
  "name": "Nginx",
  "min_tipi_version": "4.5.0",
  "available": true,
  "port": 8754,
  "exposable": true,
  "dynamic_config": true,
  "id": "nginx",
  "description": "Simple webserver to test your tipi install. An alternative to the hello-world app.",
  "tipi_version": 3,
  "version": "1.25.3",
  "categories": ["utilities"],
  "short_desc": "Open-source simple and fast web server.",
  "author": "nginx",
  "source": "https://github.com/nginx/nginx",
  "website": "https://www.nginx.com/",
  "form_fields": [],
  "supported_architectures": ["arm64", "amd64"],
  "created_at": 1691943801422,
  "updated_at": 1729872794208
}
See the config.json options reference for app
metadata and the Dynamic Compose Reference
for all x-runtipi options.
Add a description.md file in the metadata folder with a description of your app. This will be displayed in the Runtipi dashboard.
Add a logo.jpg image in the metadata folder. This will be used as the app’s icon in the Runtipi dashboard. Use a square image with a 1:1 aspect ratio.
The final folder structure should look like this:
- config.json
- docker-compose.yml
- description.md
- logo.jpg
Commit and push your repository
Once you’ve added your app, create a new branch and commit your changes:
git checkout -b add-nginx-app
git add .
git commit -m "Add Nginx app"
git push -u origin add-nginx-app
Create a pull request
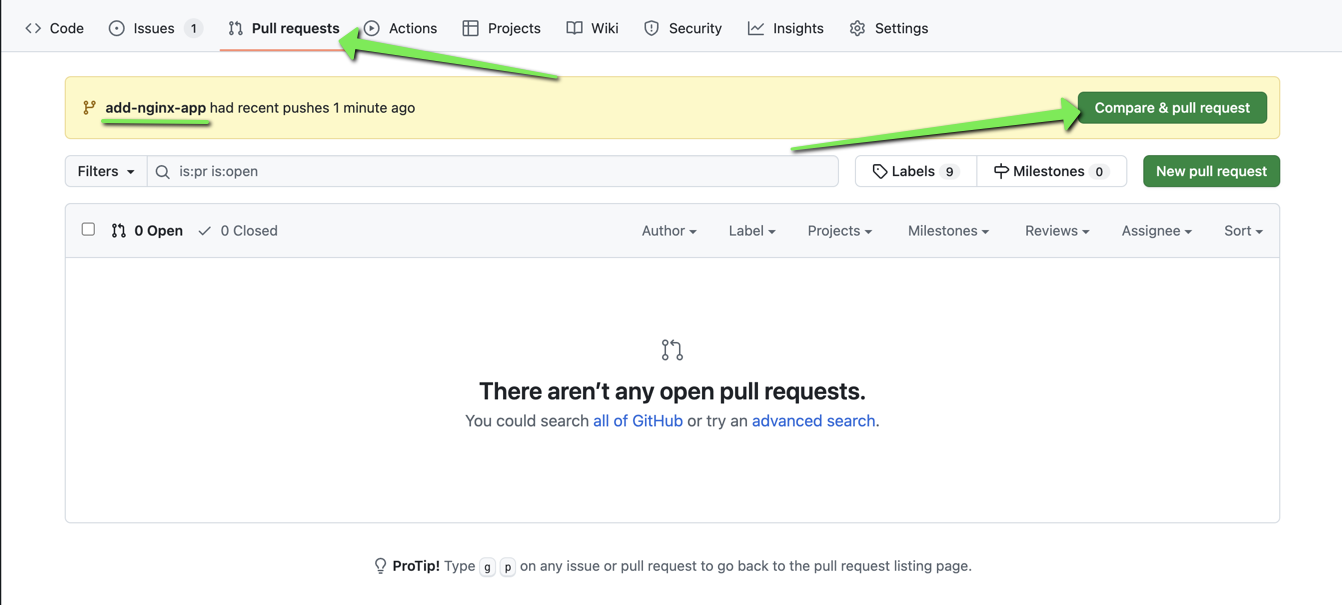
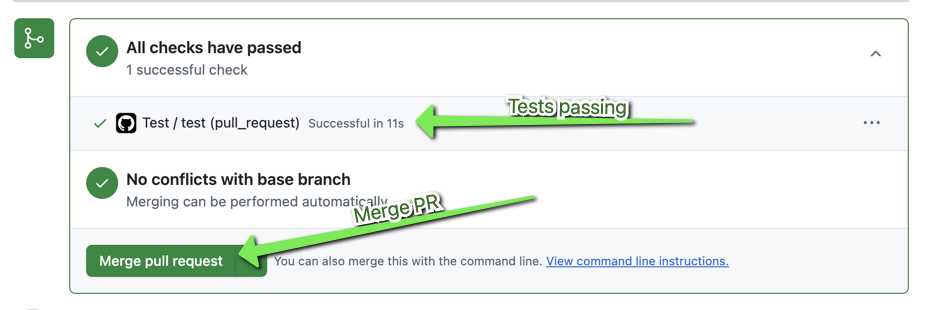
Head over to your GitHub repository and create a pull request. This will allow you to review your changes before merging them into the main branch. A default test suite will run to check that your app is valid and follows the Runtipi app store file format.
Once the tests pass, you can merge your pull request into the main branch.
Test your new app
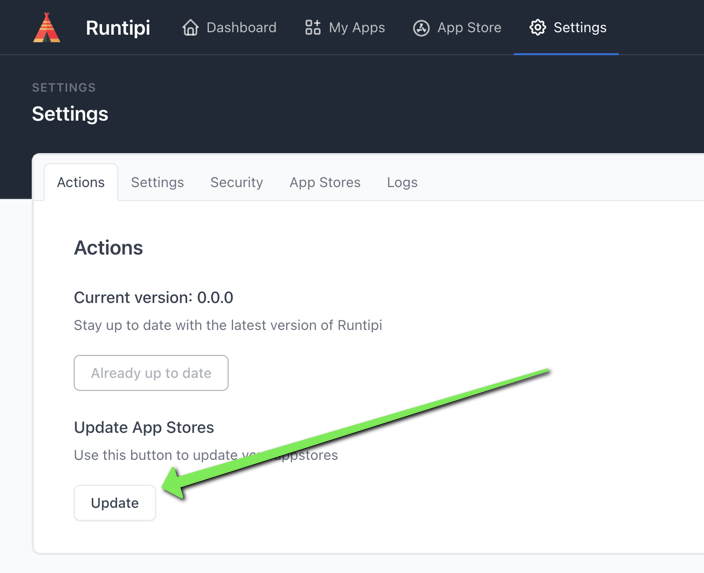
Go to the Runtipi settings page and click on the “Update App Stores” button. This will pull the latest changes from your repository and update the app store. You can now try to install your new app.
Maintenance
After creating your app store, you’ll need to maintain it by adding new apps, updating existing ones, and ensuring compatibility with new Runtipi versions. Runtipi sometime introduces new features or changes that may require updates to your apps. You’ll find a warning in the Runtipi dashboard if any of your apps need attention.
When migrating apps to a new schema version, make sure to bump the min_tipi_version field in the config.json file to the current Runtipi version.
Best practices
Here are some best practices to follow when creating your own app store:
- Use semantic versioning for your apps, such as
1.0.0,1.2.3, etc. - Avoid using
latesttags in Docker images as they can break your apps in the future - Test your apps thoroughly before publishing them
- Include comprehensive documentation in your app descriptions
- Regularly update your apps to keep them secure and compatible with the latest version of Runtipi
- Use
docker-compose.ymlwithx-runtipifor new apps
Troubleshooting
If you encounter issues with your custom app store:
- Ensure your app’s
config.jsonanddocker-compose.ymlfiles are valid using the validation tools - Verify that the folder structure matches what Runtipi expects
- Check that the
idfield inconfig.jsonmatches the folder name - Make sure you’re using the dynamic compose format correctly
- Look for errors in the Runtipi logs (located in
runtipi/logsby default)
Sharing your app store
Once you’ve created your app store, you can share it with others by providing them with your repository URL. They can add it to their Runtipi instance in the same way you did.
Consider documenting your app store with a README.md file in the repository root to help others understand what apps are included and how to use them.